
In this month's Tart kit, we are adding texture and line to your own printed cloth with the buttonhole stitch.
To begin: press your hand-dyed fabric and tape it to your padded work surface. Pour a small amount of paint into a styrofoam plate or onto piece of freezer paper.

Using the foam stamp and/or bubble wrap, apply the paint to the fabric. If you have other geometric stamps, feel free to use them as well. The bone rings may also be used as stamps.


When the paint has dried, press it carefully with your iron. Layer the printed fabric and the muslin and insert into the hoop for the next step. You will now embroider the fabric with the hand-dyed threads to add texture and line to the surface. Work with your printed circles. There are many websites that will give you directions for doing the buttonhole stitch. Try these: http://inaminuteago.com or http://sheepspace.ca or http://quietermoments.wordpress.com or http://stitchschool.blogspot.com.


When you have completed the embroidery, quilt the piece. Now you will add the embellishments: chenille stem, washers, rings and/or beads. The chenille stem can be painted and couched with the buttonhole stitch. And the washers and rings can be covered with the buttonhole stitch as well.


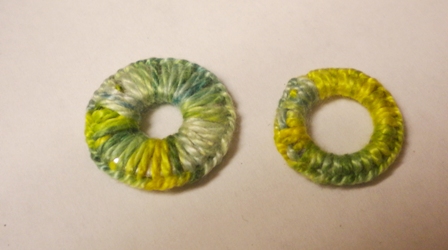

Add these embellishments to the surface of your piece for even more texture.