Thursday, February 17, 2011

February Tart Kit: Quilt and Paint


Susan's sample is an example of a quilted and painted background. With multiple machine stitched patterns, she has created a very interesting background for her sunflower. This lesson is designed for you to practice the technique on a small piece before attempting it on a larger piece. It is a little scary to spend a lot of time quilting without knowing how the paint will look when it is done. Experiment with this little piece to get confident and then try it on a larger piece or one that could use a little pizazz!

The kit contains two pieces of fabric and a piece of batting. The intention of the lesson is for you to paint the black side, but it is up to you. Maybe you'll want to paint both sides. So layer your fabric and prepare it for free motion quilting or hand quilting.


This project is a great way for you to practice your free motion quilting. There are several sources for designs. The March issue of Quilting Arts has several articles about free motion quilting. Or check out Leah Day's free motion quilting project for 365 filler designs. We suggest that you do your quilting on the colored fabric with black thread as the top thread and in the bobbin rather than on the black side since it is very difficult to see what you are quilting. A thread that matches your fabric will be a subtle detail. Try a contrasting thread to see a different result.


When you have completed your quilting, it is time to paint. We have included Lumiere paint in the kit, but any fabric paint will work well. On your deli wrap or other palette, squeeze out a sizable amount of paint.


Load the foam roller with the paint. Depending on how much you started with, you may need to add more paint to the palette until the roller is filled with paint.


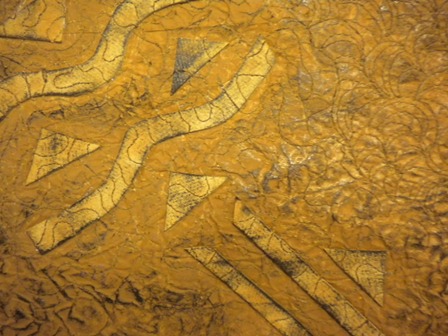
With a light touch, roll the paint roller across your quilted area. You want the paint to stay on the top of the fabric, rather than down into the stitched area. This may take a little experimentation.


As you can see, the paint creates a design element in contrast with the stitched areas. Multiple applications of paint can be added, or additional colors placed strategically. Also the paint can be applied with a paint brush if you want to highlight specific areas.


This lesson is great for changing the look of an old piece that didn't work. It might just need a layer of paint over the quilting. Adding paint over quilting may be perfect for highlighting one area of a large piece. Be daring and try it!

Friday, January 21, 2011

January Tart Kit: Wet Felting: A New Way

This month we are using a product that can make wet-felting much easier and less "work". Artfelt Paper is used as the base of the process and will be washed out when the wool fibers have been shrunk and felted.


You are using the foam and felting needle to baste your fibers to the Artfelt Paper. The actual felting will be done with water and your dryer. Determine the size of your project and cut the Artfelt Paper accordingly. You may have to move it around your foam in order to do the basting.


You will needlefelt baste the wool fibers in layers onto the Artfelt Paper, first horizontally and then vertically, gradually building up to the desired density. You may want to draw a design on the paper and "paint" the areas in with specific fibers. While these photos don't show it, be sure to leave a margin of paper around the fibers. 

 Move the paper over the foam to needlefelt the entire area designed. Add yarn, or specific fibers for accent and detail as desired.

Remove the basted fibers and paper from the foam and take it to your sink. With the paper side down, wet the fibers with a spray bottle of cool water until the piece is saturated. The paper will become translucent. Press out excess water before removing from the sink.

On a flat surface, lay the fiber/paper unit on a single layer of a plastic bag. The plastic will keep the fibers from touching and felting into a tube. Lay your piece at one end, making sure the plastic entends beyond the paper and fibers on both sides and the top edge.

Roll the paper/fibers jelly roll style with the plastic bag and secure with rubber bands.

 Throw the banded tube into your dryer for 10 to 15 minutes. It is not necessary to have a hot dryer. You can put it into the dryer with a load of clothes as well.

After 15 minutes, check the felting process. If you want more felting, re-roll the piece and plastic by turning it 90 degrees, secure it and dry it again. The fibers will still be damp and the paper should be crinkled as the wool shrinks, but the paper doesn't. Take the paper/fiber piece back to your sink with the paper side up and pour boiling water over the paper to dissolve it. Finish removing the residue by rinsing with water.

Let the felted wool dry flat. The piece can then be used as the background or applique. You may want to needlefelt other yarns or fibers onto the felted piece.

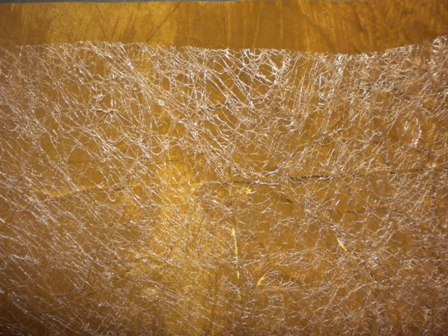
If you are interested in making a weaving similar to the sample above, simply lay your fibers in a grid keeping areas open. Wet, roll and dry as instructed above.

Tuesday, December 21, 2010

December Tart Kit: Paper Leather


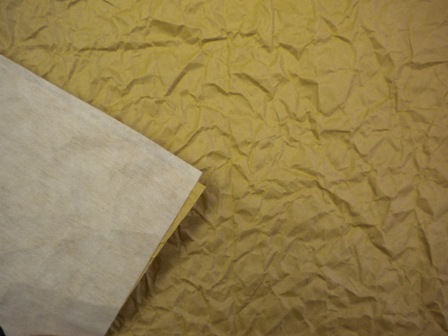
This month we are converting brown paper into leather. With wrinkles, paint, grunge board, and ink, you can simulate the look of leather. Because of the interfacing on the back side, it is sturdy enough to sew. Sue Anne made this small piece by combining paper leather with denim to create a western look.


Crinkle and wrinkle the piece of brown paper in your kit. You want lots of lines and creases.


Smooth out the paper and gently press the wrinkles flat.


Iron the piece of fusible interfacing to what will become the back side of your leather. Be sure the interfacing is well-adhered. Trim the paper and interfacing to match.


Dilute the brown paint with a small amount of water and paint it over the surface of the paper. Allow the paper to dry.


Carefully adhere the Misty Fuse to the front side of the paper, protecting your iron with a teflon sheet.


Cut shapes from the grunge board and fuse them to the paper by pressing them onto the Misty Fuse. Again protect your iron. You may have to use steam and iron from the backside as well as from the front. With enough heat, the grunge board will eventually fuse. With your sewing machine and thread, free motion stitch over and around the grunge board. It is easy to sew through, just go slowly. The thread will add more texture to the paper.


Repaint the paper, covering the grunge board and stitching with another layer of brown paint. Be sure you get the edges of the grunge board. You will be painting directly onto the exposed Misty Fuse as well. Let the paper dry completely.


Rub the black ink pad over the surface of the paper. You will decide how much. This will add more dimension and texture to your paper. When the ink has dried, the paper is ready to treat as fabric. It can be used as the background or cut into strips or used as applique. With the fusible interfacing, it will sew without tearing. Do something western!

Wednesday, November 17, 2010

November Tart Kit: Shrink Plastic Embellishments


This month we are reintroducing many of you to an old childhood craft - shrink plastic. We can create our own one-of-a-kind embellishments for our art quilts. Need purple beads, make them yourself! The kit contains half sheets of four types of shrink plastic: clear, matte, white, and inkjet. Although you will color them and shrink them generally in the same way, each type will yield its own result. The small sampler above shows the four different types. Be sure to read the general instructions about coloring and shrinking the plastic before you begin. The plastic will shrink about 50% so plan accordingly. We have included Sharpie markers for you to use to color your plastic. These markers will give you a bright intense color.


This clear piece of plastic was marked with a black Sharpie and then colored with the pens.


White Shrink Plastic

Matte Shrink Plastic

InkJet Shrink Plastic
Here are the four ready to go into the oven. If you want a hole for attaching the embellishment, you will need to punch it out before heating. Use the decorative scissors to give your piece an interested edge.If your intended embellishment will be reversible, be sure to color both sides.


As the plastic heats, it will curl. To keep the edges from curling over onto the center, cover the plastic with parchment paper during heating. When it has finished shrinking, the edges will uncurl and lie flat.


To make a bead, cut and color small strips of the shrink plastic. Wrap it around a metal knitting needle or parchment covered skewer and secure it with a rubber band.


Use your heat tool to melt the edges in order to hold them together and then remove the rubber band. Continue heating it until it has shrunk to its intended size.


The inkjet type of plastic is the only one of the four that you can run through your printer. Find a suitable photo and edit it to fit to your half sheet. Cut out each photo so that it will shrink separately.  I was able to print two photos on my half sheet. You must lighten your photo quite a bit because as the plastic shrinks, the picture will become more intense.


The shrink plastic can also be colored after heating. Try stacking pieces of plastic in a pile or add tiny colored bits to the top of a larger piece of plastic. You can also use ink and stamp a design on the plastic before heating. While the plastic is hot, impress it with a decorative tool to give it texture. Experiment to find a use that is just right for your work.


Wednesday, October 20, 2010

October Tart Kit: Positive/Negative Stenciling with Paintstiks

 
In this month's kit we are borrowing a lesson from Shelley Stokes of Cedar Canyon Textiles. She has developed patterns and designs for positive/negative stenciling using Shiva Paintstiks. Before you begin, you will need to choose a pattern from the sheet included in your kit which Shelley graciously allowed us to use. It must be enlarged to a 4" square. To do this, use a copier to enlarge at 133% and then again by 200%.


Once you have your pair of blocks enlarged to 4" make 5-6 copies so that you can put them together to form a large piece. As you can see the blocks are equal and opposite and will fit together in an alternate pattern, forming a secondary design.


You must pre-shrink the freezer paper before you make your stencil. Take it to your ironing board and press it on a lint-free surface, lift it, and press again. Cut each freezer paper sheet into an 8" square. Draw two sets of parallel lines 2" from the outside edges, forming a 4" box in the center. Trace each pattern in the two boxes. Be sure to mark the areas that will be cut out. Cut out the marked areas without cutting into the margins.


The fabric in the kit is a hand-dyed cotton and needs no pre-washing, just a light ironing. You will need to create registration marks on your fabric in order to place your stencils in the correct positions. Use an iron or chalk marker to mark multiple 4" squares. Position your first stencil in the correct position and press to adhere the freezer paper stencil. The Paintstik has a film covering the paint and needs to be removed. You can do that by twisting it off with a paper towel or cutting it away with a small kitchen knife. Rub the paint onto the waxy side of the left over freezer paper and load your brush.


With your brush at a ninety degree angle and with a circular motion, add paint to the fabric. Start with a light layer and gradually add paint until you have the intensity you desire.


Carefully remove the stencil. Position the second freezer paper stencil in its correct place on the fabric, matching the edges and registration marks. Cover your first painting with parchment paper and iron the second freezer paper pattern to the fabric. Add paint as before. Continue stenciling by alternating each pattern piece until you have filled your fabric with squares. As you can see, each pattern matches the other along the sides.


This stenciled fabric can now become your background. You can alter the fabric by painting it in a graduated color, adding the single color of paintstik over the top. Or you can stencil each pattern onto squares cut from different fabrics. You can also make your own patterns. See Cedar Canyon Textiles for Shelley's blog on learning that technique.

Wednesday, September 22, 2010

September's Tart Kit: White on White


Even though this lesson is titled "White on White", we will be using many variations of white and beige materials. The idea behind this kit is a chance for you to build some hand embroidery skills and work with a composition that does not use color as one of its design elements. We want you to create a piece that is interesting because of the texture, pattern and value contrasts.


The kit contents contain a variety of threads, yarns, and fabrics. Add other textures from your stash to give yourself enough materials to be inspired. Think about dimension and pattern, contrast and focal point. How will your piece be interesting and draw the viewer in without using color?

Use basic embroidery stitches or teach yourself some new ones. We have included a couple of websites that will give you lessons on embroidery as well as our own stitch glossary:

If you want, use your machine to complement your handwork.

For design composition inspiration, learn about zentangles - a purposeful way of doodling. You can find great information at www.zentangle.com.

One of the threads in your kit is a polyester metallic blending filiament. It can be used with one of your other threads to add just a bit of sparkle to your embroidery. Susan used it in the leaf stitch of the flower petals.


For those of you who love handstitching this lesson will be a treat! For those of you who don't, you may find that even a little bit of embroidery on your art quilt will be enough to add texture and dimension in a way your machine stitching cannot. Have fun!