Thursday, November 17, 2011

November's Tart Kit: Dyeing with Cords


This month we are dyeing with cords to color fabric. The cords have been impregnated with dye which when mixed with a solution of salt and warm water and boiled will transform your white pfd cotton into a vibrant piece of cloth. Be sure to protect your work space, clothing and hands from the dye. You may want to wear a mask as well. There are six colors of cording in your kit. You can use the colors randomly or be specific about blending the colors. Check your colors by cutting an end and placing it on a wet paper towel. You may want to tear your fabric into smaller pieces so that you can try different variations of cord placement.

Lay your cords on your fabric in any configuration you choose. You may use scotch tape to anchor the cords. We have placed them in an "X", in lines, and as snippets.


Carefully, keeping the cords in place, either fold, roll, or scrunch the fabric.
 
Fold the outside edges to the center, repeat until you have a small bundle. Secure with rubber bands.

As you roll the fabric, tuck the length of cord into the roll.

Once rolled, twist and secure with rubber bands.

  
Enclose the snippets inside your "envelope" of fabric.

And then scrunch into a ball. Secure with rubber bands.

In a container that will not be used for food, mix a solution of salt and hot water. Immerse your bundle into the water until it is completely saturated. Dye will migrate into the water so do one bundle at a time. When it is saturated, squeeze and massage the bundle to transfer the color through all the layers.

Insert the bundle into a ziplock bag and "burp" it. Drop the ziplock bag into a pot of boiling water and boil for 20 minutes.


After 20 minutes, remove the bag carefully from the hot water and let it cool in the sink. Remove the fabric from the bag and remove the cords. Rinse thoroughly. If your fabric will be washed in the future, you will want to use soap and water to remove the excess dye.


X's


Lines


Snippets


You have also received a small piece of handdyed cotton that you can over dye.
As long as there is color in the cords, you can dye with them. You can also use your colored salt/water solution to dye, although it will leave the fabric a pale color. Experiment with your cord placements and color combinations and see what interesting designs you can make.  

Wednesday, October 19, 2011

October Tart Kit: Variations on Handmade Paper


This month we are using Kleenex tissue with a solution of glue and water to create backgrounds and molded embellishments. This technique allows you to experiment with mixed media by combining this lesson with fabric as part of a larger art piece.

Prepare a work surface so that you can work with glue and not worry about your project sticking. We used the shiny side of freezer paper. Using the recipe in the kit directions, mix up a solution of glue and water. We'll start with the directions for making a sheet of paper. Separate the Kleenex tissue into 10 to 12 plies and set aside.

Lay one ply on the freezer paper and paint with the glue solution.


Continue adding plies of Kleenex and painting with glue until you have one or two plies left. If you want to insert items for color and interest, you will do it close to the top surface. In your kit, you have rose petals, a cocktail napkin, and tissue paper. Split the napkin into its top ply before using. The tissue paper can be made into confetti or torn or cut into shapes before using. Consider adding threads, fibers, newspaper, or other papers.

The top layer of Kleenex will add an opaque finish.


Once the sheet has dried, it can be peeled off the freezer paper and used as the background or as part of a larger piece. It can be painted, stitched, or printed. Be sure to tape the leading edge of the handmade paper to another sheet of computer paper before running it through your printer.


To make a mold, use the foam sheets included in your kit. You can mold over the design or into the design depending on your choice.


Paint the mold with the glue solution before putting your first layer of tissue on the foam.


Cover each ply with the glue solution, making sure each layer is well saturated and the air bubbles have been removed. Use the brush to push the Kleenex into and around the mold.


You will notice when the glue dries, the top layers have the most texture and the layers next to the mold are more smooth. It is your choice which side to use.


Your paper can be left white if you desire. We have included watercolor pencils for you to use to color your paper. For this pear, the color was applied dry and a brush was used to blend the colors. You may also want to experiment with acrylic paints or markers. Try coloring the glue before painting the Kleenex.


As with any paper, it can be moistened and torn to give a deckled edge. Your finished paper can be sewn or glued to a background. Use a long stitch length to avoid perforating the paper.


Sunday, September 25, 2011

September's Tart Kit: Print * Stitch * Embellish with the Buttonhole Stitch


In this month's Tart kit, we are adding texture and line to your own printed cloth with the buttonhole stitch.

To begin: press your hand-dyed fabric and tape it to your padded work surface. Pour a small amount of paint into a styrofoam plate or onto piece of freezer paper.


Using the foam stamp and/or bubble wrap, apply the paint to the fabric. If you have other geometric stamps, feel free to use them as well. The bone rings may also be used as stamps.


When the paint has dried, press it carefully with your iron. Layer the printed fabric and the muslin and insert into the hoop for the next step. You will now embroider the fabric with the hand-dyed threads to add texture and line to the surface. Work with your printed circles. There are many websites that will give you directions for doing the buttonhole stitch. Try these: http://inaminuteago.com or http://sheepspace.ca or http://quietermoments.wordpress.com or http://stitchschool.blogspot.com.

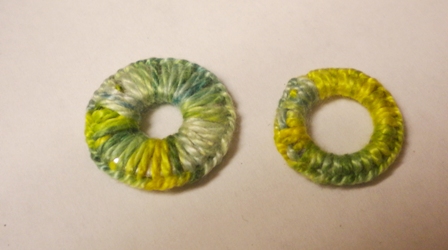
When you have completed the embroidery, quilt the piece. Now you will add the embellishments: chenille stem, washers, rings and/or beads. The chenille stem can be painted and couched with the buttonhole stitch. And the washers and rings can be covered with the buttonhole stitch as well.


Add these embellishments to the surface of your piece for even more texture. 

Wednesday, August 17, 2011

August's Tart Kit: Spraying Silk


Susan's spiral sample shows the layers of silk that have been sprayed with Dye-na-flow and sandwiched into a small quilted piece. This is an example of this month's kit where you will color silk with droplets of paint sprayed onto the surface. You have three types of silk, three colors of Dye-na-flow, and  a spray bottle. Use the newspaper included in the kit to make a mask or a stencil you have at home to create a pattern on the silks. The three colors will blend to make secondary colors and an interesting painted surface.

Cut or tear the newspaper and lay it over the silk fabric. You may want to cut multiples of the same shape to use in the second or third layering.


Dilute the paint with water so that it will spray from the pump. Spray the first color over the fabric and stencil, making sure you do not oversaturate the fabric.


Remove the stencil and replace it in another position with the white unpainted areas open to the next layer of paint. You will be masking some of the area which has the first color.


Continue spraying and repositioning the stencil until you have achieved the desired results.


Instead of using a stencil, try pleating the silk. Press with an iron to hold the pleats. Spray the first color onto the surface of the fabric.


Open the fabric and refold into pleats in another position - possibly 180 degrees from the first folds. Press and spray with a second color.


By folding or bunching the silk, you can create color on the surface that is visible.


Refolding or rebunching and spraying with another color will give you an interesting surface of droplets of color. Set the color with your iron and you are ready to piece the silk into your next art quilt.


Cut the smaller pieces of silk into narrow strips and spray with multiple colors to use as accents or ruffles.

Thursday, July 21, 2011

July's Tart Kit: Sketching with Thread


With this month's Tart kit, we want you to practice your machine stitching. You will be using the four spools of thread in the kit (plus any other colors from your stash) to "draw" a design on the white fabric also included. The stitching will take place on the stabilized cotton before you layer it and quilt it. Use the thread to create contour lines and shading by building it up or by changing values.

Lightly draw a design on the fabric with a pencil. If you are tracing your design, a light box or window will help.

You will stabilize the cotton by fusing it to the piece of "Stitch and Tear" with Steam-a-Seam Lite. There should be enough body to the fabric that you will not need a hoop. The Stitch and Tear will glide smoothly over your machines's throat plate.


Thread your machine with a colored thread and use the bobbin included in the kit for your bottom thread. You may need to rewind the thread from the cardboard bobbin to your machine's bobbin. By adjusting your tension slightly looser, the bobbin thread will stay on the wrong side of the fabric.

You will be free-motion stitching so drop your feed dogs if that is your method. Some folks leave their feed dogs up and reduce the pressure on the pressure foot when doing straight line stitching. You will start with straight lines to sketch. Use parallel lines close together to create color on the cloth. Where you want more intense color, you will stitch across your first lines.


To create contours and values, your stitching may be curved. Remember sketching isn't necessarily filling in completely with thread. It may be creating a suggestion of line and value.


You can try blending two threads together in the needle and see if that gives you interesting values. You can try stitching on colored fabric. Or change from straight line to curves. The goal is to create your design in thread only - no fabric patches. When you have finished, leave the stabilizer in place and layer it with backing and batting. Quilt and bind it. This is your opportunity to practice your free motion stitching. Have fun!